July 15, 2026 · Updated August 11, 2026
OCR Use Cases & Workflows (Students, Business & Everyday Life)
Practical ways to use OCR: lecture slides and notes for students, receipts and invoices for business, plus handwriting workflows.
By Elango P · About this site
Most OCR moments start the same way: a photo or screenshot of text you need in editable form — a lecture slide, an invoice, a receipt, a whiteboard, a page of handwriting. The engine underneath is the same each time; what changes is what you crop, which language you pick, and how carefully you verify the result. This guide walks through the workflows that come up most for students, small businesses, and everyday phone use, using imgtotext.in as the working example throughout.
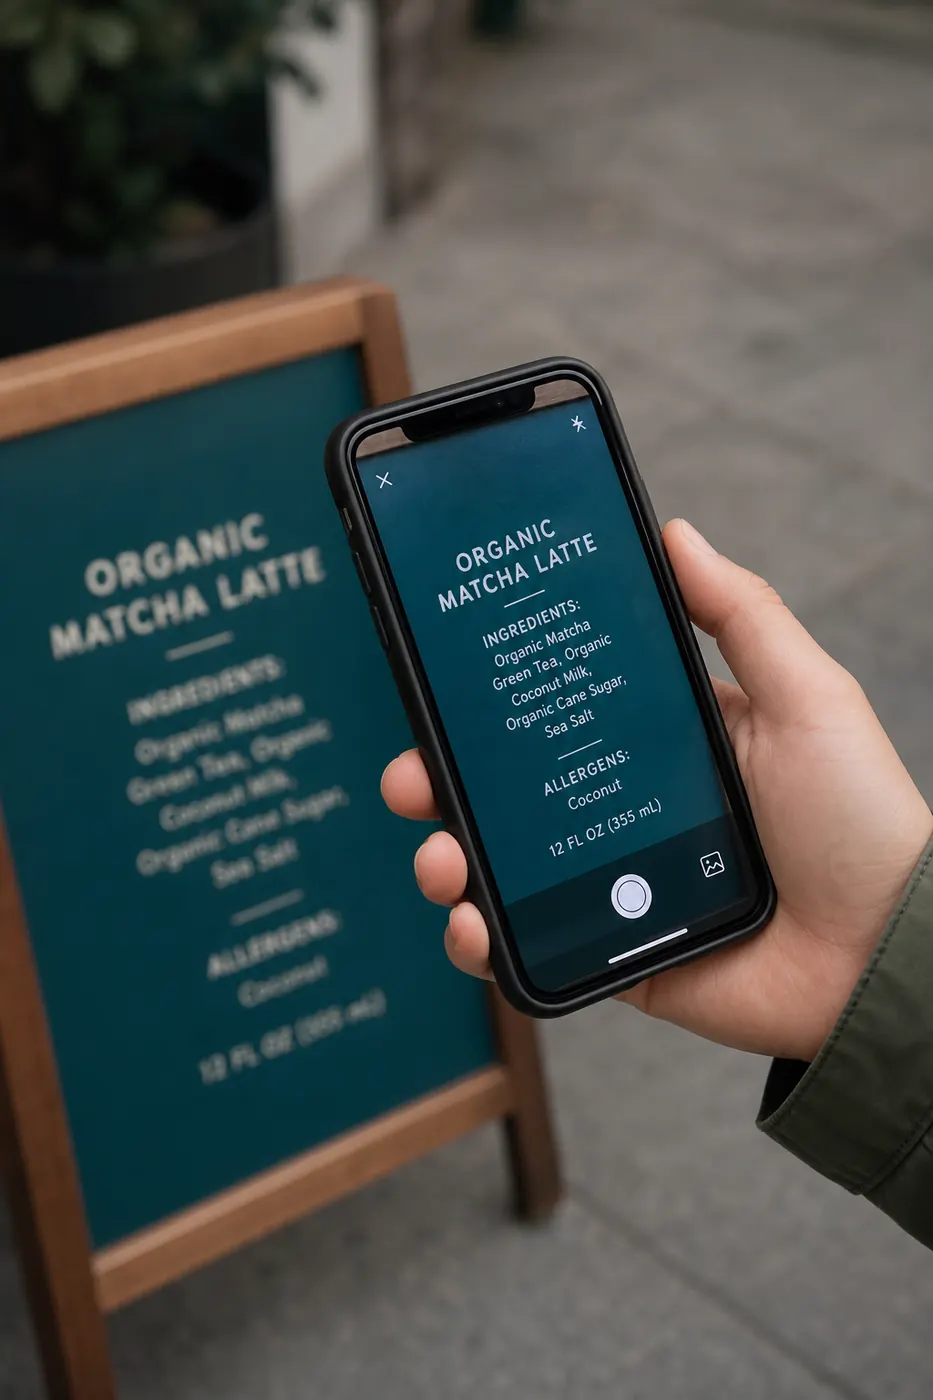
Table of Contents
- The Core Workflow
- For Students
- For Small Businesses and Teams
- Invoice Processing Without Enterprise Software
- Receipts and Expenses
- On Mobile
- Whiteboards and Meetings
- Handwritten Notes
- Old Books and Archives
- Identity Documents: Handle With Caution
- Related Reading
The Core Workflow
Every use case below is a variation on the same steps, so it's worth stating once instead of repeating it in each section:
- Capture a clear image — fill the frame, keep it level, avoid glare, prefer a native screenshot over a photo of a screen.
- Open https://imgtotext.in (mobile-responsive, no account needed) or jump straight to /image-to-text.
- Upload a PNG, JPG, JPEG, WEBP, or GIF.
- Select the language that matches the content — twelve are supported, including English, Spanish, French, German, Hindi, and Arabic.
- Try Clean Mode for screenshots and tidy documents; compare with it off for photos of paper, chalkboards, or thermal receipts.
- Run OCR. AI OCR (Gemini via the site's API) runs first for 10 free uses per day per IP address; browser-based Tesseract.js keeps working after that, so you're never fully blocked.
- Copy the text or download it as TXT, then verify anything that involves money, dates, or names before you file it anywhere.
Images aren't stored permanently (/about, /faq). The sections below assume this workflow and only call out what's different for each situation.
For Students
Students live surrounded by text they can't copy: projector slides, whiteboard photos, textbook problems shared as images, PDF scans of reserved readings. OCR removes the retyping chore so your time goes to understanding the material instead.
Lectures and whiteboards. Stand where your body doesn't cast a shadow, take section photos of a large board and stitch the notes afterward, and OCR within a day while you still remember context that helps you catch misreads. For handwriting-heavy boards, see Handwritten Notes below.
Slides and screenshots. If a lecture is digital, screenshot the visible slide (where your school's recording policy allows it) rather than photographing the projector — a screenshot has none of the moiré and glare a camera introduces.
Language learners. Switch the OCR language dropdown to match the worksheet, not your device's interface language. Bilingual worksheets often need two crops, one per language region.
Accessibility. Once text exists digitally, you can enlarge it, recolor it, or send it to text-to-speech — a real help for anyone who struggles with small photocopier fonts. Treat this as a personal productivity aid, not a substitute for institution-approved accommodations when those are required.
Integrity rules that don't bend: don't OCR closed-book exam content you're forbidden to copy, cite scanned sources properly, and respect copyright when sharing digitized reserved readings — personal study notes are different from redistributing full texts.
Example: four classmates split a stack of phone photos of a library-only journal article by page range, run each batch through OCR, and paste into a shared doc with page labels for a literature review — then still check quotes against the original before citing them. What used to be an evening of retyping becomes a short review pass.
Crop out grades, IDs, or classmates' names that happen to land in the frame before you upload, and organize the output the same day: summarize into your own words, turn definitions into flashcards, and avoid letting a folder of raw OCR text pile up unread.
For Small Businesses and Teams
Vendor invoices photographed and emailed, signed forms scanned to a shared drive, packing labels, screenshots of a customer's error message — teams that retype these quietly lose payroll hours. A lightweight OCR habit reclaims that time, provided you pair it with a verification step.
Where it pays off fastest: accounts payable capturing receipt and invoice fields, operations reading SKU and lot numbers from photo logs, HR digitizing signed acknowledgments for keyword search, and support pulling error text from a customer's screenshot.
Write down a short policy even for a free tool: which document types are allowed on a web OCR tool versus offline-only, cropping rules so unrelated PII stays out of frame, a verification checklist for amounts and bank details, and who owns the language dropdown for multilingual suppliers. Because the AI allowance is counted per IP address rather than per person, an office sharing one connection shares one pool of ten — so teams processing a lot of images in one sitting should stagger the work or agree an "AI priority" queue rather than assuming unlimited capacity.
This is a fit for opportunistic, small-batch work — not a full PDF ingestion server. Multi-page packets still need page export first (see Advanced OCR Techniques), and high-volume automation eventually needs a real API and audit trail (see OCR for Developers). There's no CRM plugin or SSO here — copy/paste and TXT export are the integration layer unless you build your own.
Invoice Processing Without Enterprise Software
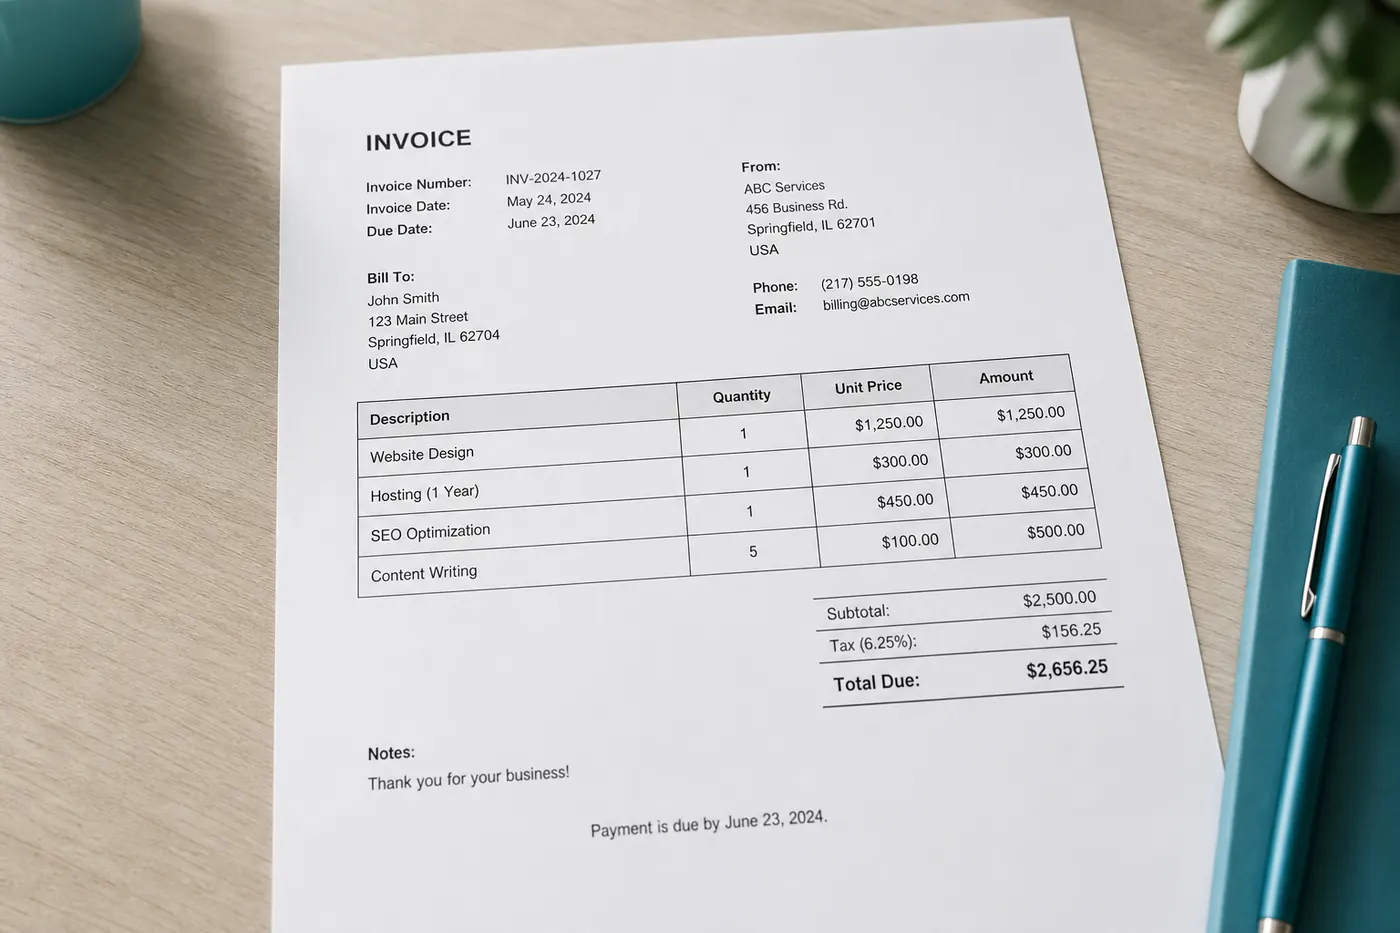
Small teams rarely need a six-figure AP suite on day one. A practical workflow for 2–20 people looks like this:
- Invoices land in a shared inbox or folder — prefer vendor PDFs with a real text layer when you can get them, since those need no OCR at all.
- Someone saves a clean image or page render (one invoice per file, straight, high contrast).
- OCR produces editable text.
- A human checks vendor name, amount, date, and PO reference before anything gets entered.
- Verified fields go into the accounting tool; the original PDF or image is retained per policy.
The verification gate is non-negotiable, and one line matters more than the rest: if the extracted bank details differ from what's on file, escalate and confirm out-of-band — never move funds based on OCR text alone. Altered payment instructions are a known fraud vector, and a convincing-looking scanned invoice does not prove the routing number is legitimate.
For a tiny team, one person may wear every hat in this table, but writing the checklist down anyway keeps a tired reviewer from skipping it:
| Role | Responsibility |
|---|---|
| Inbox owner | Saves files, names them YYYY-MM-DD_vendor_amount |
| OCR operator | Runs the tool, pastes raw text into a staging note |
| Approver | Runs the verification gate, flags anomalies |
| Bookkeeper | Posts entries, reconciles statements |
For multi-page invoices, OCR page by page after rasterizing, confirm later pages still belong to the same invoice header, and mark blank scanned backs so they don't confuse anyone downstream. Consistent filenames (YYYY-MM-DD_vendor_invoiceno_amount) save more time long-term than a marginally better OCR engine. Signals you've outgrown this manual workflow: more than roughly 50 invoices a month, multi-currency tax handling, or a requirement for automatic three-way PO matching — at that point look at a dedicated AP platform, but keep the human verification gate regardless of how automated the rest becomes.
Receipts and Expenses
Receipts are short, dense, and hostile to OCR: thermal fade, narrow columns, tiny fonts, and logos that look like letters. OCR still beats retyping line items, as long as you treat every amount as unverified until you check it against the paper or your payment app.
What OCR recovers well: merchant names in plain print, dates in common formats, line descriptions with decent contrast, and totals — once verified. What it struggles with: embossed card brands (they're graphics, not text), QR-only payloads (use a QR reader, not OCR), badly faded thermal paper, and handwritten tip amounts.
Capture tips specific to receipts: photograph them the same day since thermal ink fades, shoot perpendicular to the paper (an angled shot squeezes digit widths), and include the full total block — cropping mid-number is a classic mistake. Common failure patterns worth watching for: a $ misread as S, a merchant name duplicated from both the logo and the printed header, and locale-specific decimal separators getting flipped.
Many receipts show partial card numbers or loyalty phone numbers. Crop to the merchant, date, items, and total when that's all you actually need — don't upload a full wallet photo for one receipt. Paste OCR output into a staging note first rather than directly into a locked approval field, since reversing a posted entry costs more than editing a draft.
On Mobile
Phones introduce motion blur, perspective distortion, and aggressive compression — but you also have the advantage of being on-site with the document. imgtotext.in's layout works the same way in mobile Safari or Chrome as it does on desktop.
Capture checklist: tap to focus on the text (not the table edge), hold steady for half a second after the shutter, fill the frame rather than using digital zoom, and tilt laminated or glossy items until glare moves off the text. Prefer a screenshot over a photo whenever the text is already on your screen — boarding passes, chat messages, articles.
Built-in "live text" tools on iOS and Android are excellent for a phone number or short snippet but weaker for long, multi-paragraph, or mixed-language extracts and don't give you a downloadable file — keep both around and use whichever fits the moment. On travel days, screenshot boarding passes and confirmations while you still have reliable Wi-Fi, since starting an OCR session and the AI path both need connectivity even though the browser fallback feels "local" once its assets are cached.
Whiteboards and Meetings
Whiteboards promise shared understanding and deliver glare, marker ghosts, and handwriting that wanders off the baseline. It's still worth capturing action items and agenda columns written in semi-print marker — just expect to rewrite anything that was pure cursive brainstorming.
In the room: wait for a pause so people step out of frame, shift position until specular glare (usually from ceiling LEDs) leaves the text, shoot square-on rather than at an angle, and take a wide photo for context plus a tight crop for OCR — only upload the tight one. Before uploading, crop out any confidential content you shouldn't be digitizing.
Black or dark-blue marker on a matte white board OCRs best; red and green lose contrast under warm lighting, and glass boards reflect every overhead light. If your team runs a lot of workshops, reserve one board column for decisions written in neat capitals and keep messy ideation elsewhere — your future self extracting the notes will thank you. After extraction, convert ambiguous arrows into explicit sentences ("Priya owns the API spike by Friday") and have someone double-check names before the summary goes out; a mangled teammate's name in a retro summary is a small but real trust cost.
Handwritten Notes
Handwriting is the hardest case for any OCR engine, consumer or enterprise. Results range from genuinely good to unusable depending on the writer, pen, and paper.
Often workable: clear block letters, high-contrast black ink on white, generous line spacing, one language per page. Often difficult: joined cursive, pencil on gray paper, overlapping strikethroughs, water stains, and low light. AI OCR handles awkward handwriting noticeably better than classical engines, which is why the AI path is worth spending your daily allowance on for handwriting jobs specifically — treat the result as a first draft you'll edit, not a final transcript, especially for anything medical, legal, or exam-related.
Capture from directly above to reduce perspective skew, use bright even light rather than a single overhead bulb (which casts a shadow from your own hand), and photograph one note cluster at a time rather than a crowded notebook spread. If a page only partly works, retry with a tighter crop, try Clean Mode both ways, or just retake the photo if you can still see the blur or shadow yourself. If you can't read a word, don't expect the model to invent the right one reliably — mark it [illegible] and move on.
For numbers specifically — measurements, dates, quantities — walk through every one with a finger on the page after OCR; handwritten numerals (1/7, 5/S, 0/6) are a frequent failure point.
Old Books and Archives
Old books fight OCR on several fronts at once: yellowed paper, foxing spots, tight gutters, decorative typefaces, and faded ink. Digitizing a chapter for personal study or accessibility is doable with careful capture — as long as you've confirmed you're allowed to copy the pages (public domain, licensed, or rights you own) and you respect any library rules about handling rare or brittle volumes.
Capture: support the spine with foam wedges rather than cracking it open flat, shoot one page at a time when the gutter is deep, use diffuse daylight or two soft lamps instead of a single flash, and fill the frame with the text block. Before upload: crop to a single column if the page uses two, rotate until lines are level, and skip decorative borders that carry no text you need.
Realistically, expect a short proofreading pass on any historical page — faded ink and foxing produce character substitutions (the historical long s often reads as an f, for example), and dense scholarly footnotes tend to merge into the body text (theory24 instead of theory plus a superscript reference). Work in passes rather than skimming once: structure first (headings, page breaks), then numbers, then proper nouns, then a final spellcheck with archaic spellings manually restored where you want them.
A flatbed scanner still wins for fragile pages and consistent lighting; a phone wins for speed and for books that can't leave a reading room. Many people use a phone to triage which chapters matter, then a flatbed for the pages they'll actually proofread and keep.
Identity Documents: Handle With Caution
Passports, driver's licenses, Aadhaar cards, and similar IDs are tempting OCR targets — dense fields, standardized layouts — and among the worst casual uploads you can make to any free web tool. This section is about legal, consented, verification-first use only. It is not advice for bypassing identity checks or fraud, and if you don't have a lawful basis and the person's informed consent, don't photograph or upload the document at all.
Why it's a privacy problem. An ID image combines legal name, date of birth, a document number, and often a portrait — a single misplaced file enables social engineering and account-takeover attempts against the holder. Consumer OCR sites, including honest ones, are built for flyers and screenshots, not for storing government identity data. Unauthorized collection or sharing of Aadhaar-equivalent identifiers can violate local law; when in doubt, stop and ask counsel.
Accuracy is worse than marketing implies. Even strong AI OCR misreads 0/O, 1/I/l, and characters under the specular glare common on polycarbonate cards. Never treat OCR output as authoritative identity — a wrong digit in a passport number is not a cosmetic typo, and any legitimate workflow needs human or issuer-API verification regardless of how clean the extraction looks.
If you're digitizing your own document for something like a visa form: work on a device you control, crop to only the fields you need (skip the portrait and machine-readable zone where possible), confirm every character against the physical card before submitting anything, and delete the source image afterward if your backup policy allows it.
What organizations should do instead: use licensed identity-verification platforms with audit logs and issuer checks, minimize stored data to hashes or verification tokens where regulation allows, and train staff that "quick OCR from a photographed ID" is a policy violation, not a shortcut. Keep identity verification and ordinary document OCR (invoices, receipts, notes) as clearly separate risk categories in your own head and in your team's training.
Right versus wrong, concretely: photographing a customer's ID "to save typing" into a spreadsheet via a free OCR site, then leaving the photo in a shared drive, is wrong. Directing the customer through a compliant onboarding vendor — or having them type their own numbers while looking at the card, verified visually by staff under policy — is right. Treat any unsolicited request to "just OCR your ID to verify" as a red flag; legitimate institutions use their own authenticated channels, not a generic image-to-text site linked over chat.
Related Reading
- The Ultimate Guide to OCR Technology — how the underlying pipeline works
- Advanced OCR Techniques — capture and preprocessing that raises accuracy
- OCR for Developers — when a web UI isn't enough and you need an API
Try free image to text OCR
Upload an image to extract editable text — AI OCR runs first (images go to Google Gemini via our server); browser OCR is the fallback. No signup required.
Extract text from images